
Swift on the server... without the server
13 Jul 2018A guide to using Swift with AWS Lambda
Server side Swift has come a long way in the almost 3 years since Swift was made open source and available on Linux for the first time. Still, progress has been slow as the ecosystem develops. In particular, there is still no clear winner for a http server framework.
But what if we could have server side Swift… without the server? A serverless server side Swift?
You may have heard the new buzzword in tech lately: “Serverless”. Like “The Cloud” it still just means someone else’s server. It’s the next step in evolution after services like Heroku. Services like AWS Lambda handle the entire server mechanics, except for the actual business logic, which the call functions. Instead of building a server that handles the logic of the http protocol, you simply define the output for a single endpoint. And even better, because each endpoint is it’s own function, you can even use different languages for different endpoints. This is a great way to sneak Swift into your server side stack if there is a particular area of your api that would work well as a Swift endpoint.
Lambda supports the following lanugages:
You’ll notice that Swift is absent there. Fear not though, you can run any executable process from one of those languages, making almost anything possible. So, our first step is to get Swift running at all on Lambda.
Let’s start with a basic Swift package.
mkdir hello-lambda
cd hello-lambda
swift package init --type executable
swift run
That last command will build and run the package locally. You should see “Hello, world!” printed out.
Most guides will tell you to use Node to spawn a child process. Let’s create a simple bootstrap with JS that executes our Swift code:
// index.js
const spawn = require("child_process").spawn;

exports.handler = (event, context, callback) => {
  const command = "libraries/ld-linux-x86-64.so.2";
  const main = spawn(command, ["--library-path", "libraries", "./main"], {
    input: JSON.stringify(event)
  });

  let output = "";
  main.stdout.on("data", data => {
    output += data;
  });

  main.on("close", code => {
    callback(code === 0 ? null : "invalid exit code" + code, output);
  });
};
The jist of this is that it launches a process “main” and returns the output of that command to lambda.
Now here’e the fun part. Lambda, as you might expect runs Linux. If you run swift build on your Mac it will create an executable for other Macs. We’ll need a Linux environment to compile for that OS (note, it would be awesome if Swift had something like GOOS and GOARCH). The best way I know to do that is to use Docker. Once you have Docker for Mac installed, you can run the following to open a bash prompt with swift tools already installed:
docker run -it -v "$PWD":/app --workdir /app swift bash
That will download and run the official Swift docker image, which has the Swift build tools pre installed. From there compile the module in release mode:
swift build --configuration=release

mkdir -p .build/lambda/libraries
ldd .build/release/hello-lambda | grep so | sed -e '/^[^\t]/ d' | sed -e 's/\t//' | sed -e 's/.*=..//' | sed -e 's/ (0.*)//' | xargs -i% cp % .build/lambda/libraries
You should be able to statically link all the libraries, including the standard library with -Xswiftc -static-stdlib -Xswiftc -static-executable. Unforutanately that seems to be broken in Swift 4 (see SR-7039 and SR-3819). So we have to include every dynamic library our excecutable links to with our lambda bundle. That’s what the last command does. ldd .build/release/hello-lambda lists the libraries and their locations and the rest processes that and copies them to .build/lambda/libraries.
Finally, let’s bundle everything up into a zip archive and upload it to lambda:
cp index.js .build/lambda
cp .build/release/hello-lambda .build/lambda/main

cd .build/lambda
zip main.zip index.js main libraries/*
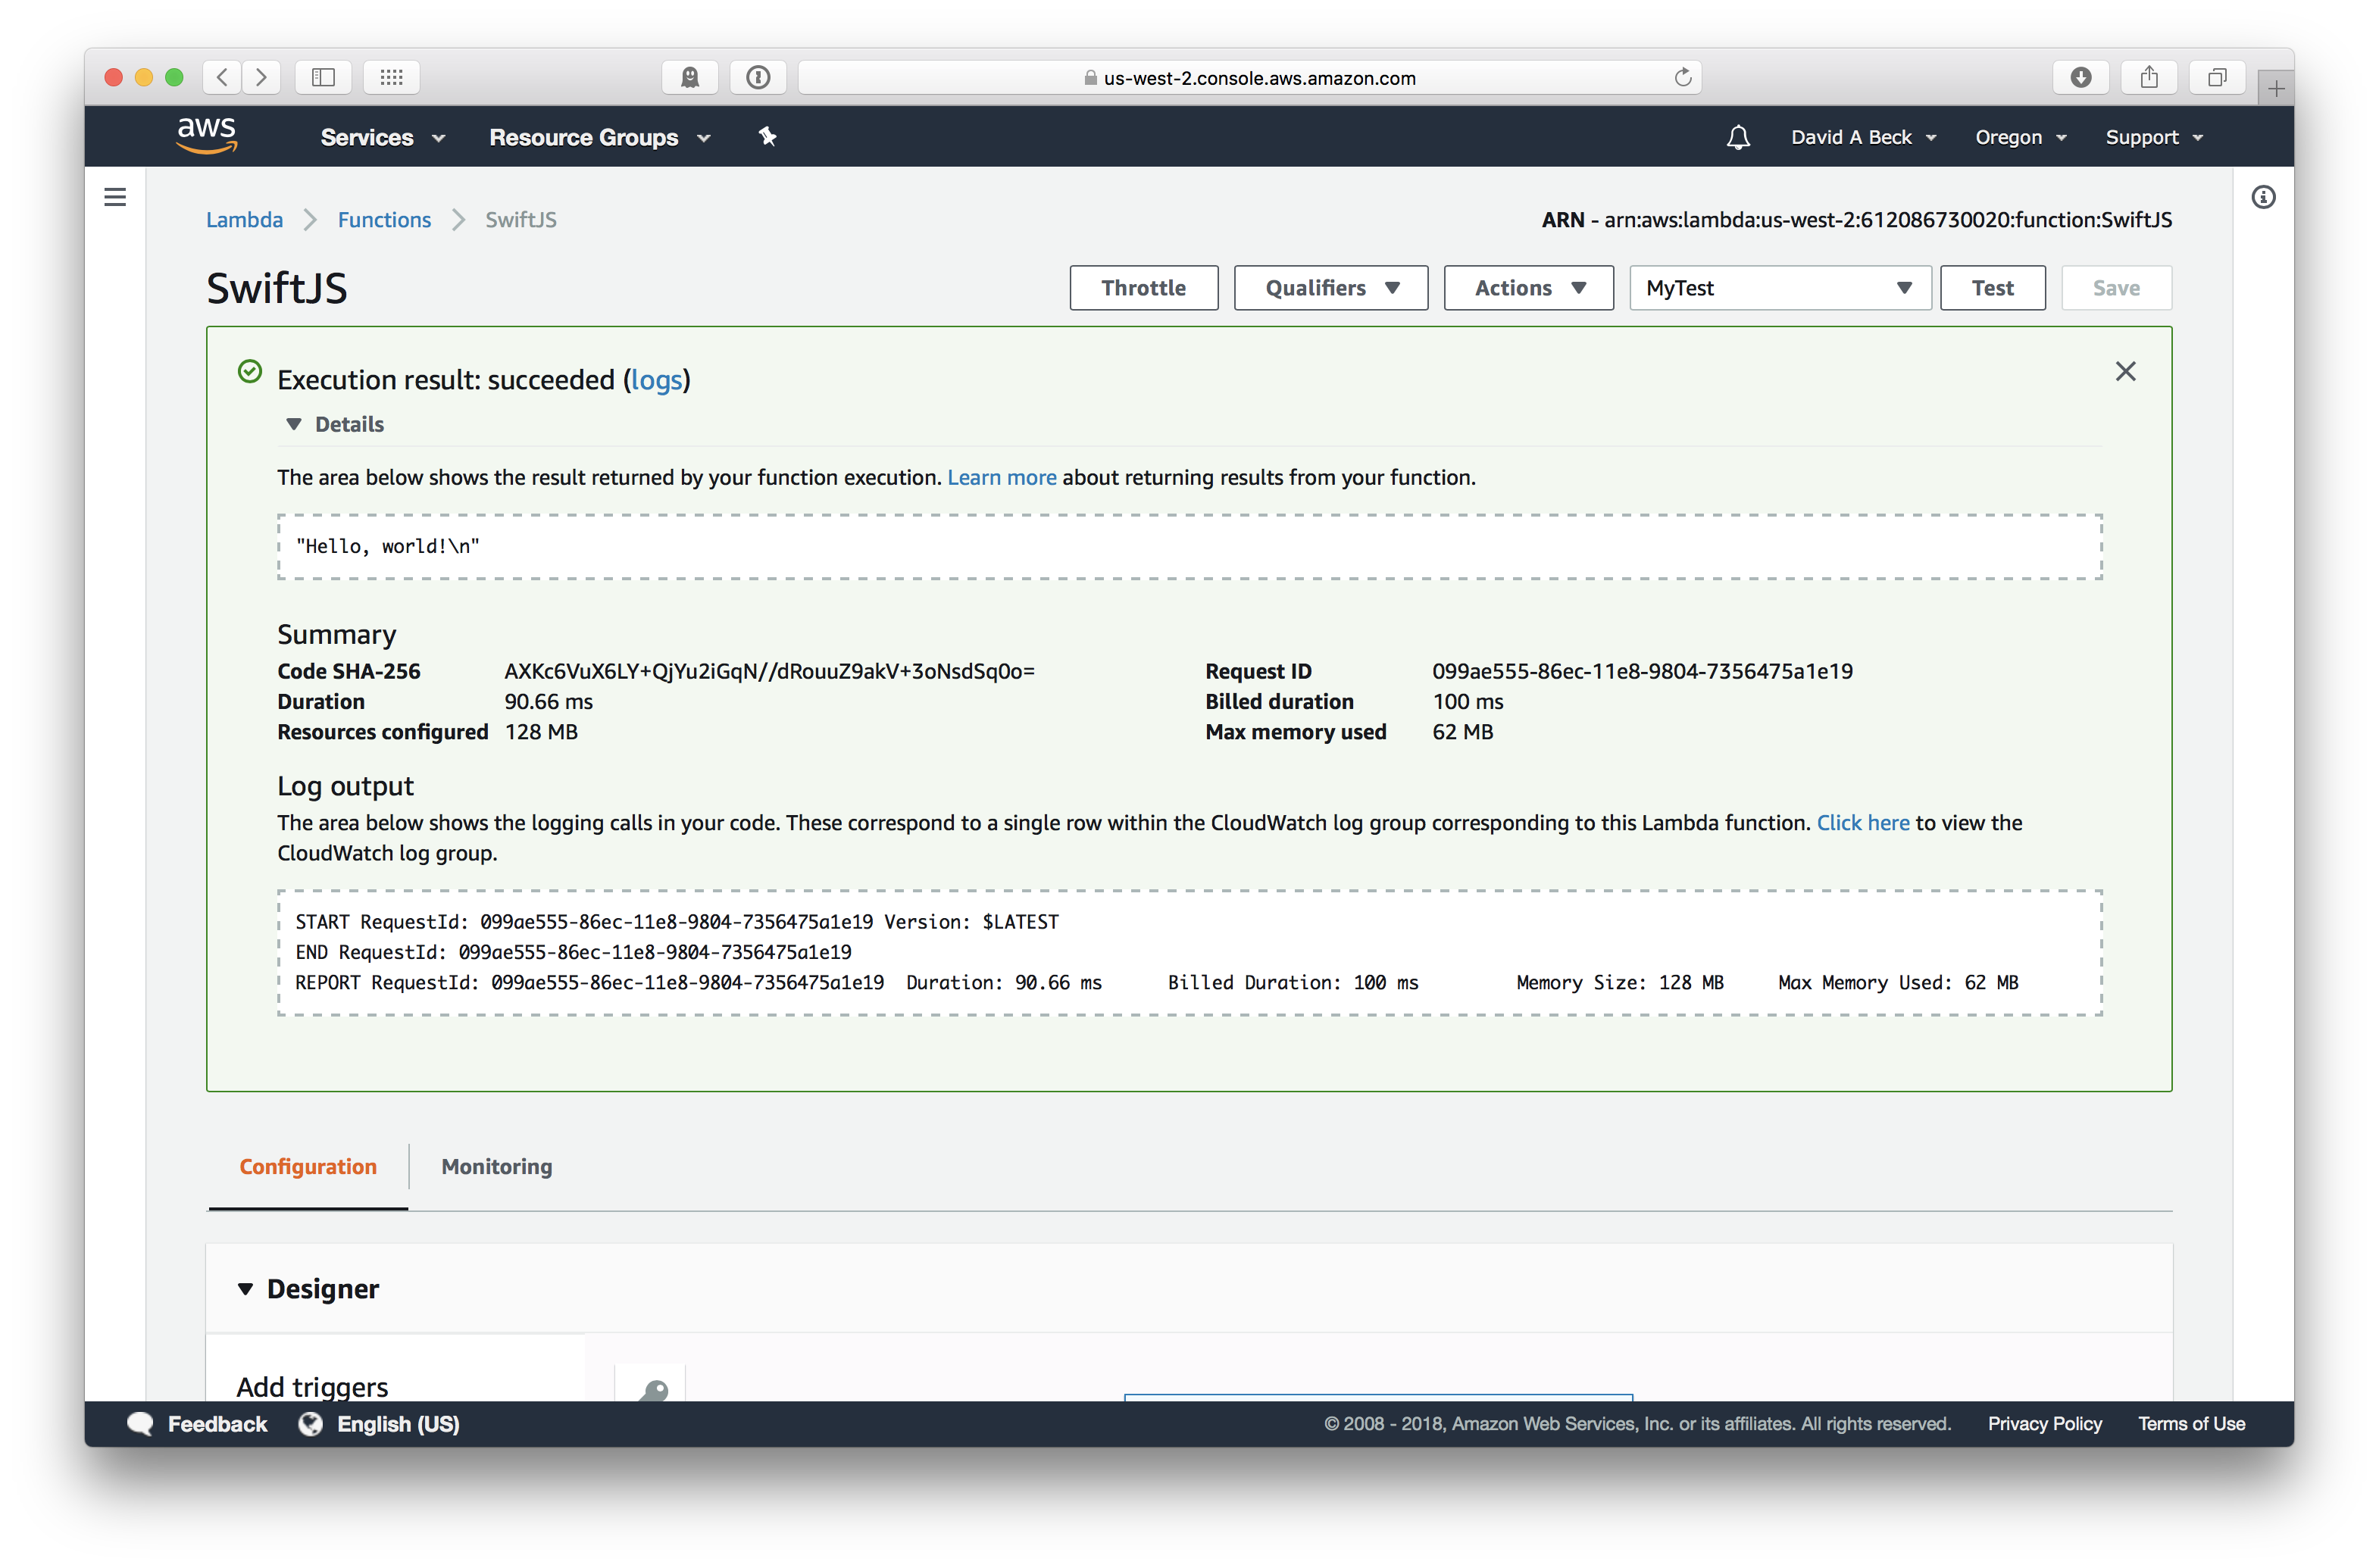
That will leave you with `.build/lambda/main.zip. You can either upload that using the AWS Console. The handler is “index.handler” (index.js + the name of our export in that file). Once created, you can select the “Test” button to run the function from the console. The first time you do AWS will ask you for test data. You can select the default for now. When you run the test, you should see a green box with “Execution result: succeeded” and if you expeand that, you should see the output from our Swift excecutable.
Next steps
Obviously this is far from a working server application. There are some serious performance downsides compared to one of the native languages, and this is all very manual to just get a single function running.
In part 2 we build on this example to create a more efficient and reusable package.